TUTORIAL
|
This page is intended to provide information on presenting my .wav and
mp3 files should you decide the program Sports Sounds Pro
will not be purchased. Here you will find instructions on setting up your
desktop to view several directories. And you will be getting acquainted with
Windows Media Player. Windows Media Player can provide instantaneous
access to any .wav or mp3 file on your hard drive, however, it will
require double-clicking on a file to get it to play. There are also
helpful tips regarding connecting your computer to a PA system.
|
First, Create a folder on your hard drive named Organ Music, and copy the contents you intend to use initially from Disc 1 to the new Organ Music directory. I always tell new users to install only the number of files you plan on using your first time out. Then add more content as you get accustomed to presenting the music.
Next, create another folder, name it Sound Effects, and copy the files you prefer from Disc 2 and Disc 3 to that new folder. Create a third folder, and name it Stings. Copy the "stings" you want to use from the Stings collection to that new folder.
Then from your Desktop:
1. Double click the My Computer icon
2. Double click the Drive on which you've created the new Organ Music, Sound Effects, and Stings folders.
3. Select the folder named Organ Music. Right-click, and select "Send To," then "Desktop." You have created a shortcut for the Organ Music folder on your Desktop. Every time you open the folder from your Desktop, it will have the same attributes and location on your screen. Pretty cool!
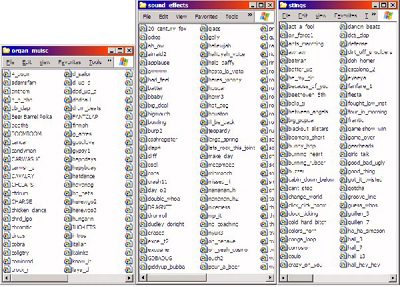
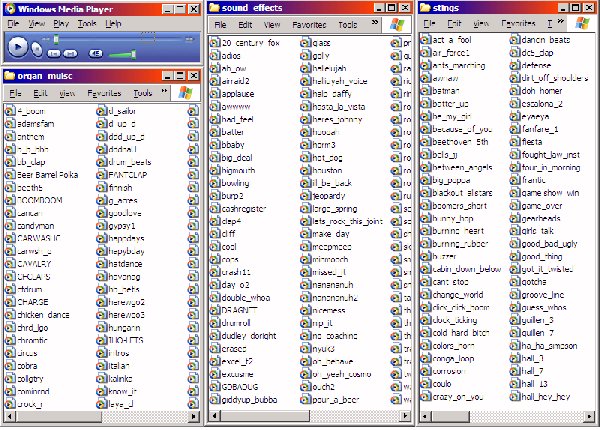
Open and view the contents of the folder Organ Music.
4. With your mouse, stretch the top and bottom of the window till it reaches near full-screen height. You want to save an inch or two on top for the soon to arrive Windows Media Player Control Panel. Stretch the Organ Music window for width, until it's roughly one-third the width of your screen. Now, drag the entire Organ Music window to the far left of the screen.
5. At the top of the Organ Music folder, click View.
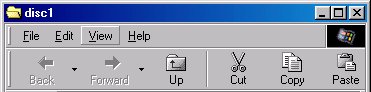
and select List, to arrange the sound files alphabetically in columns.
6. Create a similar window for the Sound Effects folder by repeating steps 1 - 5. Position the Sound Effects window in the middle of your computer screen. Do the same for the Stings folder and position it in the right third of your screen. The idea is to arrange the folders so they resemble the graphic below.
PLAYING .WAV and MP3 FILES WITH WINDOWS XP
Open Window Media Player. You want to enable the program to be the default player for your .wav and mp3 files. To do this go to Tools>Options>File Types (Tab), and make sure the correct boxes are checked.
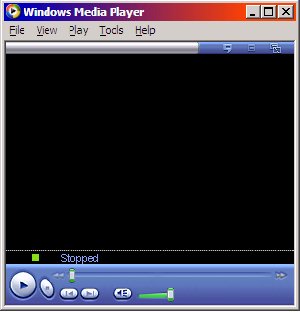
When Windows Media Player is first loaded, it appears in the "Full Mode," which can take up your whole screen. Just Click on "View," and select "Skin Mode." Windows Media Player will now look like this:
Next, take your mouse and grab the bottom right corner of the Windows Media Player, and resize it until it looks like this:
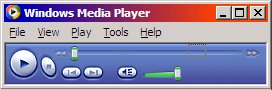
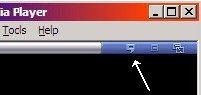
If the Start, Stop, etc. buttons disappear while you resize the Skin Mode to resemble the image above, try toggling the "Caption" function by clicking on the Caption icon. Locate the Caption icon by referring to the image below
Finally, drag the Windows Media Player control panel to the far upper left of your screen, so it fits over the Organ Music folder as depicted in the graphic below.
|
Getting the music from your computer to your mixing board is no different
than patching in a CD player or tape deck. All of my sound events are
"mono," so there's no need to configure a stereo connection. In the image
of the front of my laptop computer below, the input on the left is for a
microphone or 'audio-in." The jack on the right is the "audio-out" jack
for a headset or powered speakers. Think of the "powered speakers" as
the sound system in your sports facility.

Head to you local electronics parts store and purchase the correct adapters and patch cords to get from the audio-out jack in your computer to the input jack for a channel on your board. There is a very comprehensive explanation of connecting a computer to your sound system at Bill Buschmeier's Sports Sounds Pro web site. He has graciously allowed me to present the text here:
How to hook up to a Stadium Sound System
I am getting a number of inquiries on how to connect the output from a pc (desktop or laptop) to a stadium sound system. There is no real easy answer, each situation is a little different. The important thing to remember is that your pc's output is a line level output while most stadium sound systems only accept microphone level inputs. Here is what works for me. I use the cables/adapters below to connect my laptop to a small field audio mixer (a Shure model 267, around $100.00 plus on ebay). The shure mixer has switchable inputs between mic and line level. The channel I use for my laptop is set to line level. The mixer's main output is also switchable between line and microphone level. I leave it at the microphone level and use a normal XLR microphone cable to connect to the sound system. The main problem is that the output jack on your pc is a 1/8" mini jack while the input jack on the mixer is an XLR (Female). Here is where the cables come into play. The first step is to use the "Y" cable (which comes with the Radio Shack Ground-Loop Isolator) which converts the 1/8" stereo output to two RCA jacks. This plugs into the jack on your pc. The next step is to attach the Ground-Loop Isolator, note that is has two cables on it, a long one and a short one. You connect the SHORT one to the "Y" cable you just connected to your pc in the prior step. The third step is to attach the RCA three phone plugs adaptor to the LONG cable from the Ground-Loop Isolator. Remember that the output of your pc is stereo and this adapter converts it back to mono. The fourth speciality cable has an RCA plug (Male) to an XLR plug (Male) that connects to the input XLR Female on the mixer. This cable is more difficult to find but is available on-line from several sources. I have included a link to a firm called Quality Electronics which does carry that cable. If they don't have it, use Google to search the internet for a RCA plug to XLR plug adapter cable. 1). Ground-Loop Isolator (Radio Shack part number 270-054. around $15.00), it comes with a 1/8" stereo plug to two RCA jacks "Y" cable. 2). RCA three phone plugs adapter (Radio Shack part number 274-511, around $2.50) 3). RCA phono plug (Male) to XLR (Male) cable (Quality Electronics part number XRM-110 RCA(M) to XLR(M), around $11.00) Why the Ground-Loop Isolator It is quite common to experience a hum or transformer noise when you connect up various audio systems. The Ground-Loop Isolator eliminates that problem of a ground loop between your pc and the sound system. (Thanks Bill Buschmeier!)
|
Feel free to contact me with any questions regarding the Windows based audio presentation. You can also e-mail me your phone number (suggest a time to call), and I will be happy to contact you.
E-mail Stanley Sound Productions
or by phone at 727-271-9220 (Mornings are best, EST)